

In the fast-paced realm of modern software creation, Azure DevOps Pipeline stands out as a game-changing tool that paves the way for smoother, speedier, and more dependable development. Azure DevOps Pipeline is at the heart of this evolution, a powerful tool that has redefined how software is developed, tested, and deployed.
In this blog, we will embark on a journey to explore the world of Azure DevOps Pipeline, delving into its intricate details, unparalleled features, and the remarkable benefits it brings to the development table.
As we journey through its inner workings, features, and advantages, you’ll gain the knowledge and confidence to integrate this tool into your development arsenal, setting the stage for a more agile, efficient, and successful software development journey.
Table of Contents
- What is Azure Pipeline?
- What is Azure DevOps Pipeline?
- Key Components of Azure DevOps Pipeline
- How can one build and Apply Pipelines in Azure?
- Define Pipelines Using YAML Syntax
- Define Pipelines Using Classic Interface
- Benefits of Azure DevOps Pipeline
- Features of Azure DevOps Pipelines
- Conclusion
What is Azure Pipeline?
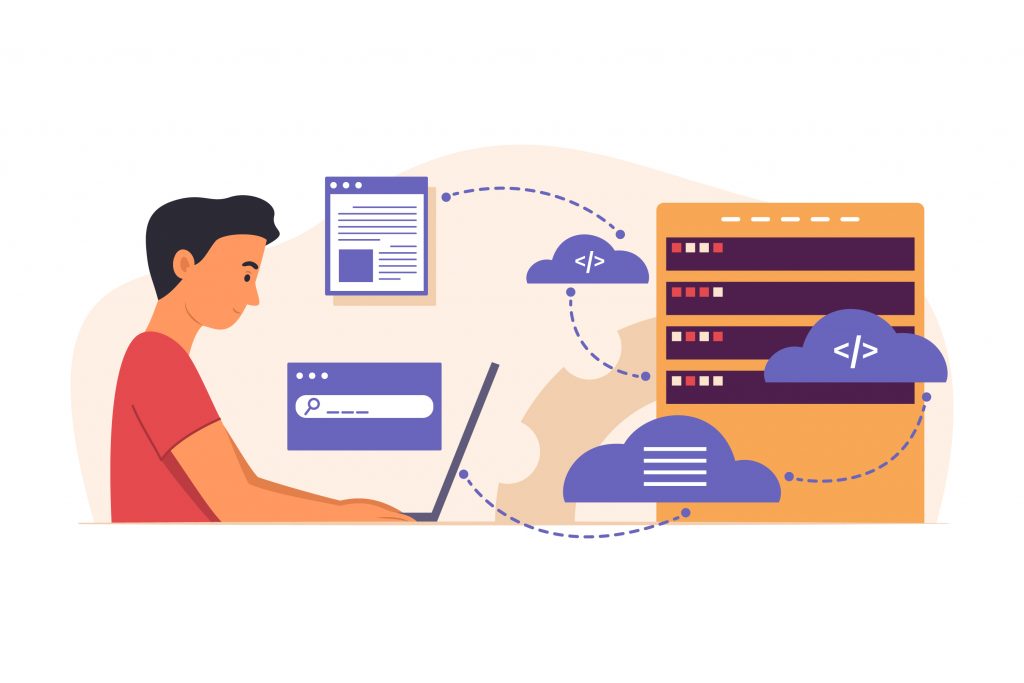
Azure Pipelines is a cloud-based continuous delivery and continuous integration (CI/CD) platform provided by Microsoft as part of its Azure DevOps services. It empowers software development teams to automate their applications’ build, test, and deployment processes, resulting in more efficient, reliable, and rapid delivery of software updates and releases. Azure Pipelines enables developers to define, manage, and execute pipelines as code, meaning the entire CI/CD workflow can be expressed and versioned in YAML files. This approach enhances collaboration, repeatability, and traceability across the development lifecycle.
What is Azure DevOps Pipeline?
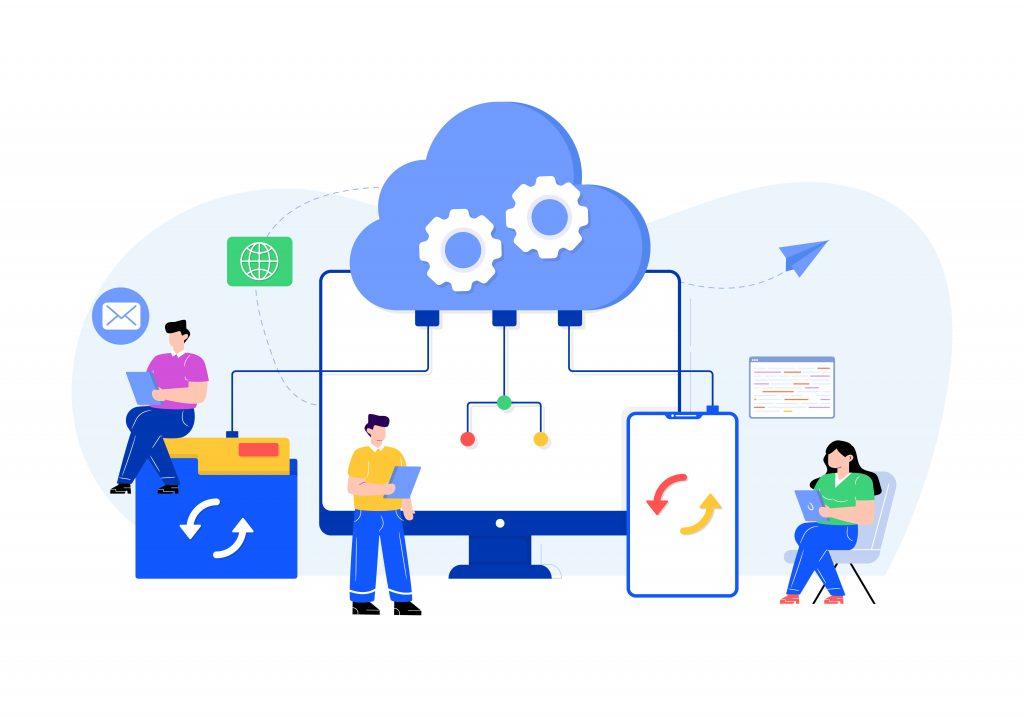
Azure DevOps Pipeline is a robust and cloud-based continuous delivery and continuous integration CI/CD) solution provided by Microsoft as part of the Azure DevOps suite. It is a versatile and automated framework for building, testing, and deploying software applications with speed, efficiency, and consistency.
Azure DevOps Pipeline enables developers to create, manage, and execute end-to-end pipelines encompassing tasks like code compilation, automated testing, and seamless deployment to various environments. The pipelines are defined using YAML as code, allowing for version control and collaboration.
This tool promotes collaboration among development, testing, and operations teams, fosters agile practices, and accelerates the software development lifecycle by automating manual processes and ensuring rapid and reliable software releases.
Key Components of Azure DevOps Pipeline
The key components of Azure DevOps Pipeline are the foundational elements that collectively enable the automation of software development processes. These components work together to create a structured and streamlined workflow:
- Stages: Stages represent distinct phases in the CI/CD process, such as building, testing, and deploying. They allow for the logical separation of tasks and enable controlled progression through the pipeline
- Jobs: Each stage consists of one or more jobs, which are units of work that can run concurrently. Jobs contain a set of tasks that need to be executed, such as running tests or deploying to a specific environment
- Tasks: Tasks are the steps within a job that perform specific actions, like compiling code, running tests, or deploying artifacts. They can be configured and combined to create customized workflows
- Agents: Agents are the execution environments responsible for running tasks within jobs. Azure DevOps provides both Microsoft-hosted and self-hosted agents, giving flexibility in choosing where tasks are executed
- YAML Configuration: Pipelines are defined as code using YAML (YAML Ain’t Markup Language) files. This configuration-as-code approach allows teams to version control their pipeline definitions, enabling collaboration and repeatability
- Triggers: Triggers determine when a pipeline should be executed. These include code commits, pull requests, scheduled runs, or external events. Triggers ensure pipelines run automatically when certain conditions are met
- Artifacts: Artifacts are the output of successful pipeline runs, such as compiled binaries or deployment packages. These artifacts can be stored and managed within Azure DevOps for easy access and deployment
These components collectively form the building blocks of Azure DevOps Pipeline, enabling developers to automate and optimize their development workflows, leading to quicker and more reliable software delivery.
Invensis Learning offers the leading Devops Certification Courses. Enroll now and elevate your career to a new level.
How Does One Create and Apply Pipelines in Azure?

Building and applying pipelines in Azure DevOps involves setting up a structured process for automating your software applications’ building, testing, and deployment. Here’s a detailed guide on how to create and use pipelines in Azure DevOps:
1. Access Azure DevOps:
- Log in to your Azure DevOps account
- Navigate to your project or create a new one
2. Access Pipelines:
- Once logged in, you’ll be directed to the Azure DevOps dashboard
- Click on “Pipelines” in the left navigation menu to access the Pipelines section
3. Create a New Pipeline:
- Click on the “New Pipeline” button, usually prominently displayed on the Pipelines page
- You’ll be prompted to choose where your code is stored, such as GitHub, Azure Repos, Bitbucket, etc
- Select your repository source and authenticate as necessary
4. Configure Your Pipeline:
- Azure DevOps will analyze your repository and suggest pipeline templates based on the application type. These templates provide initial configuration settings for your pipeline
- Choose a template that matches your application, such as .NET, Node.js, Python, etc. Alternatively, select the “YAML” option to define your pipeline as code
5. Define Stages, Jobs, and Tasks
- You’ll see a visual representation of your pipeline in the pipeline editor
- Start by defining stages (e.g., Build, Test, Deploy)
- Within each stage, you can add jobs that represent specific tasks. For example, a Build stage might include a job for compiling your code
6. Configure Task Details:
- For each task in a job, click on the “+” button to add a task or search for a specific task type
- Configure task parameters, such as the task type (e.g., script, Docker), input files, environment variables, and command-line arguments
- Some tasks require additional configuration, like specifying the script to run or the Docker image to use
7. Add Triggers:
- After defining your pipeline structure and tasks, configure triggers that determine when your pipeline should run
- Common triggers include continuous integration (CI) triggers like code commits, pull requests, scheduled runs, or even triggers from external sources
8. YAML Configuration:
- Switch to YAML mode to define your pipeline as code using YAML syntax
- This provides more fine-grained control over your pipeline’s structure and configuration
- YAML configuration allows you to version control your pipeline definition, promoting collaboration and auditability
9. Save and Run Pipeline:
- Once your pipeline is configured, save your changes
- You can manually trigger your pipeline to see it in action by clicking “Run” or wait for automated triggers to initiate runs based on specified conditions
10. Monitor and Troubleshoot:
- As the pipeline runs, you can monitor its progress through the Azure DevOps portal
- View task logs, error messages, and status updates to track each stage’s execution
11. View Artifacts:
- After a successful pipeline run, artifacts like compiled binaries or deployment packages will be generated
- You can access these artifacts within the Azure DevOps portal and use them for further deployment
12. Deploy and Release:
- If your pipeline includes a deployment stage, use the generated artifacts to deploy your application to your target environments, whether in development, staging, or production
Creating and applying pipelines in Azure DevOps establishes a repeatable and automated process that ensures consistent, reliable, and efficient software delivery from code changes to deployment. This approach significantly reduces manual intervention, accelerates the development lifecycle, and enables teams to focus on building great software.
Define Pipelines Using YAML Syntax
Defining pipelines using YAML (YAML Ain’t Markup Language) syntax in Azure DevOps is a powerful approach that allows you to express your continuous integration and continuous delivery (CI/CD) workflows as code.
YAML is a human-readable format that provides a structured and configurable way to specify your pipeline’s different stages, jobs, tasks, and configurations. Here’s how to define pipelines using YAML syntax:
- Access Your Repository:
- Log in to your Azure DevOps account and navigate to the desired project
- Choose a Repository:
- Choose the repository where your source code is stored (e.g., Azure Repos, GitHub)
- Create or Edit YAML File:
- Create a new YAML file in your repository or locate the existing one that will define your pipeline. It’s typically named something like azure-pipelines.yml
- Define Stages, Jobs, and Tasks:
- In the YAML file, use indentation and syntax to define different stages, jobs, and tasks
- Start with the stages section and define individual stages like “Build,” “Test,” and “Deploy”
- Within each stage, define one or more jobs that contain tasks to be executed
- Configure Tasks:
- For each job, define the tasks you want to run. Specify the task type, options, and parameters
- Tasks can be script-based, like running a shell command or executing a PowerShell script, or they can be specialized tasks for building, testing, deploying, etc.
- Add Triggers:
- Include triggers that define when the pipeline should run. This can be based on events like code commits, pull requests, scheduled runs, or custom triggers
- Save and Commit Changes:
- Once you’ve defined your pipeline using YAML, save the changes to the YAML file
- Commit and push the changes to your version control repository
- Monitor and Execute:
- Go to the Pipelines section in Azure DevOps and select the pipeline you defined in YAML
- Azure DevOps will detect the YAML file in your repository and automatically create a pipeline based on its configuration
- Run and Monitor the Pipeline:
- Trigger the pipeline manually or let it be triggered automatically based on defined triggers
- Monitor the pipeline’s progress through the Azure DevOps interface, checking logs and status updates
Define Pipelines Using Classic Interface
Defining pipelines using the classic interface in Azure DevOps involves creating and configuring pipelines through a graphical user interface (GUI) without directly using YAML code.
This approach suits users who prefer a visual and guided way of setting up their continuous integration and continuous delivery (CI/CD) workflows. Here’s how to define pipelines using the classic interface:
- Access Azure DevOps:
- Log in to your Azure DevOps account
- Access Pipelines:
- Navigate to your project
- Click on “Pipelines” in the left navigation menu
- Create a New Pipeline:
- Click on the “New Pipeline” button, usually prominently displayed on the Pipelines page
- Choose a Repository:
- Select the repository where your source code is stored, such as Azure Repos, GitHub, etc.
- Choose a Template:
- Azure DevOps will offer templates that suit common application types (e.g., .NET, Node.js, Python)
- Choose a template that matches your application to get started
- Configure Stages and Tasks:
- The classic interface will guide you through configuring stages (e.g., Build, Test, Deploy)
- For each stage, you’ll define tasks using the visual interface. These tasks could involve building, testing, or deploying your application
- Configure Triggers:
- Define triggers that determine when your pipeline should run Triggers can be based on events like code commits, pull requests, scheduled runs, or custom triggers
- Save and Review:
- Review your configured pipeline settings
- Provide a name for your pipeline
- Save and Run the Pipeline:
- Save your pipeline configuration
- You can manually trigger the pipeline to run, or it can be automatically triggered based on the defined triggers
- Monitor the Pipeline:
- Monitor its progress and status as the pipeline runs through the Azure DevOps interface
- View Artifacts:
- After successful runs, view the generated artifacts, such as compiled binaries or deployment packages
Benefits of Azure DevOps Pipeline
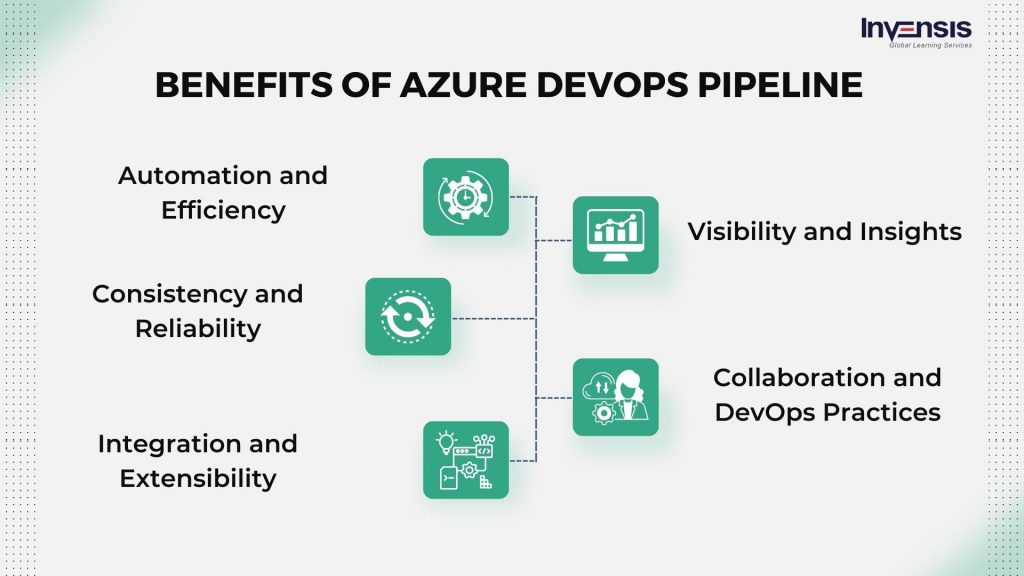
Azure DevOps Pipeline offers a range of compelling benefits that enhance the software development lifecycle and streamline the process of building, testing, and deploying applications:
- Automation and Efficiency: Azure DevOps Pipeline automates the process of building, testing, and deploying software, reducing manual effort, minimizing errors, and accelerating the delivery of updates and features
- Consistency and Reliability: By defining pipelines as code using YAML, Azure DevOps Pipeline ensures consistent and repeatable processes across different environments, leading to more reliable and predictable software releases
- Integration and Extensibility: The platform seamlessly integrates with various tools and services, allowing teams to incorporate testing, security, and deployment processes into their pipelines, enhancing overall development workflows
- Visibility and Insights: Azure DevOps Pipeline provides real-time visibility into the status of builds and deployments, enabling teams to monitor progress, identify issues, and make informed decisions for improvements
- Collaboration and DevOps Practices: Azure DevOps Pipeline promotes collaboration among development, testing, and operations teams, fostering a culture of shared responsibility and enabling the adoption of DevOps best practices for faster and more efficient software delivery
Features of Azure DevOps Pipelines
Azure DevOps Pipelines offer a range of powerful features designed to enhance the software development process and facilitate efficient continuous integration and continuous delivery (CI/CD) workflows:
- Pipeline as Code (YAML): Define and manage CI/CD workflows as code using YAML, enabling version control, collaboration, and repeatability
- Multi-Platform Support: Accommodate diverse programming languages, frameworks, and platforms for a wide range of projects
- Flexible Triggers: Automate pipeline execution based on triggers like code commits, pull requests, and scheduled runs
- Parallel and Distributed Build: Optimize resource utilization and reduce build times with support for parallel and distributed task execution
- Integrations and Extensions: Seamlessly integrate with various tools and services, expanding pipeline capabilities through third-party or custom tasks
- Artifact Management: Store and manage generated artifacts, ensuring they’re accessible for downstream deployment steps
Conclusion
Azure DevOps Pipeline emerges as a set of tools and a transformative force that reshapes the software development landscape. Its capacity to automate, streamline, and foster collaboration revolutionizes how applications are brought to life.
Whether you’re configuring pipelines through YAML or the classic interface, Azure DevOps Pipeline initiates a journey of efficiency and innovation. Parallel builds, rich task diversity, and integrations amplify productivity, while insights into pipeline progress and deployment possibilities pave the way for seamless software delivery.
This platform catalyzes creators, regardless of project scale, driving them toward a future where development is swifter, more reliable, and remarkably efficient. Azure DevOps Pipeline is not just a tool – it’s the engine propelling software ambitions to reality.
Unlock your potential and elevate your career by embracing DevOps certification courses from Invensis Learning. Gain industry-recognized expertise in agile practices, automation, and collaboration, empowering you to drive innovation and efficiency in your organization.
Seize the opportunity today and join the league of skilled professionals shaping the future of technology through DevOps.


